Do you ever see those gorgeous vision boards online and wish you could make one…but you have no artistic skills? Whether you’re artsy or not, in this blog post and video tutorial, I’m sharing how to make a pink aesthetic vision board using Canva and Pinterest for free!
Video Tutorial: How to Make a Pink Aesthetic Vision Board
If you can’t see the above embedded video, click here to watch the video directly on YouTube.
How to Make a Pink Aesthetic Vision Board Using Canva and Pinterest for Free
Keep reading to learn how to make a pink aesthetic vision board, even if you don’t have any art skills. I’ll share some easy tips and tricks to help you make a gorgeous vision board for free using Canva and Pinterest.
Note: Whilst this tutorial is for a digital vision board, you could transform the concepts to create something similar using paper, magazines, and glue. Do what makes you happy! 😉
What You’ll Need
You’ll need a couple simple and free things to do this vision board tutorial:
- A free Canva account
- A free Pinterest account
- A device (phone, computer, etc.)
Note: There are some advanced features in the Canva pro account that you may like, but you can do this vision board tutorial using the free account.
Step 1: Planning
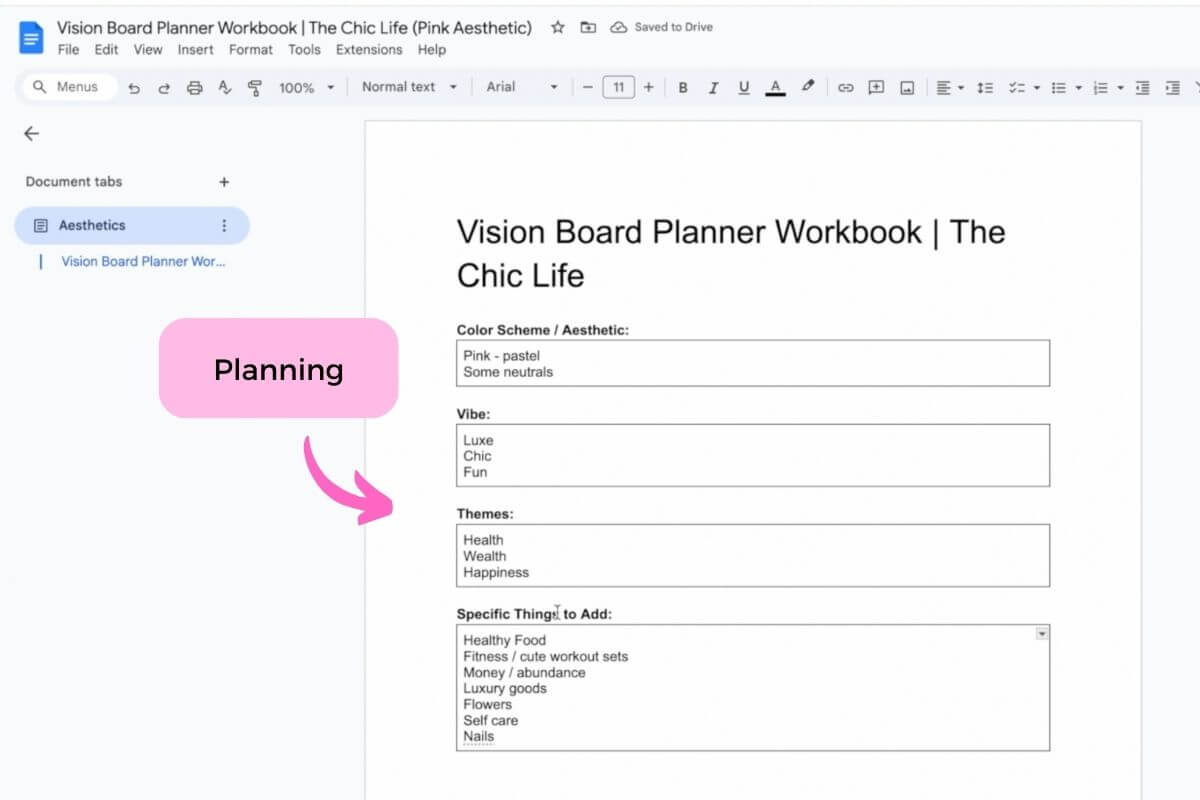
Before jumping into the visuals, it can be helpful to take a couple quick minutes to plan what kind of vision board you want to make. This will help guide which pictures to look for, which can really impact the overall look of your vision board.
Take a moment to jot some notes around your preferences on:
- Color Scheme / Aesthetic: note if you want to do a specific color scheme, like this pink aesthetic vision board example. (light, bright, moody, warm, etc.)
- Vibe: what’s the overall vibe of your desired vision board? (peaceful, powerful, uplifting, etc.)
- Themes: what are some specific themes you want your vision board to cover? (new year, health, money / abundance, travel, goals, etc.)
- Specific Things to Add: are there specific types of images you really want to add? (smoothies, beach, money, salads, marriage, abs, etc.)
Planning is not required but can be helpful for some people to keep things cohesive and on track with your vision.
Note: Another option is to just open Pinterest and notice what images you really gravitate towards and select your images more intuitively.
Step 2: Set Up Your Base
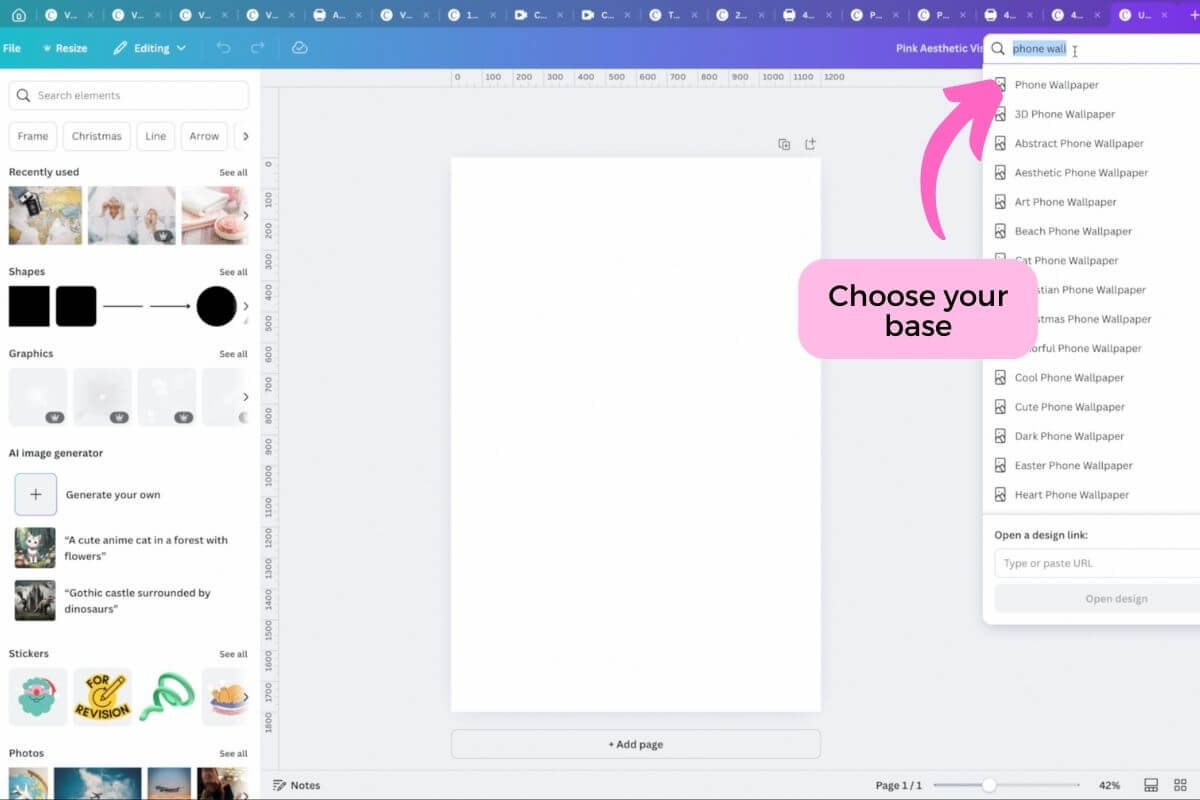
We’re going to learn how to make a pink aesthetic vision board for free using Canva.
Let’s get things set up over on Canva:
- Start creating a new tab (by clicking the “+” button in the top/right or clicking File -> New Tab)
- Select what type of vision board you’d like to make, for example:
- Phone Wallpaper* – great to set as your phone background / lockscreen
- Desktop Wallpaper* – awesome to set as your laptop / computer background
- US Letter – to print on standard paper
- A5 – to print on A5 paper
- Custom Size – to make any size you prefer
- Rename your file (in the top right – where it usually says “Untitled Design”) to your preferred name
*Tip for Wallpaper Vision Boards
*Tip: I’ve found the wallpaper fits *most* but not all phones / desktops exactly. If you want something that is an exact match, I recommend googling the dimensions of your device background and make a custom size for that.
Step 3: Get Aesthetic Images on Pinterest
Pinterest is my favorite place to get pictures, images, and graphics for aesthetic vision boards.
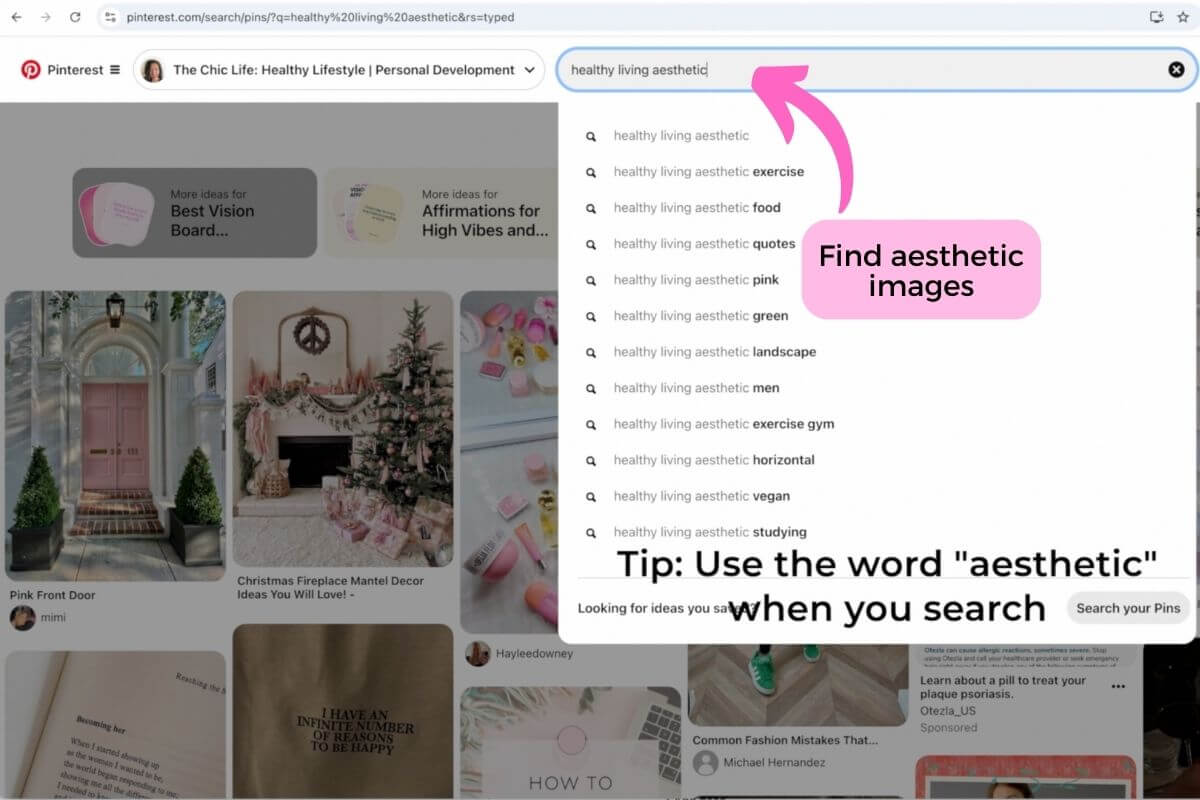
Search Tip to Find the Best Images
Tip: Using the word “aesthetic” in your search term can help you find the best looking images.
Let’s find some images on Pinterest:
- Go to your Home feed (click on the top left “hamburger menu” and select “Home feed”).
- Go to the search bar in the top of the page and enter your desired search term. For this vision board, I used:
- Healthy living aesthetic
- Pink aesthetic
- Workout clothes pink
- Pink yoga aesthetic
- Pink money
- Pink luxury
- Healthy food aesthetic
- Pink smoothies
- And if I didn’t already make so many pink aesthetic affirmations and pink vision board quotes, I’d also search for:
- Pink affirmations
- Pink quotes aesthetic
- Download images (click the “…” and then “Download image” – see screenshot below)
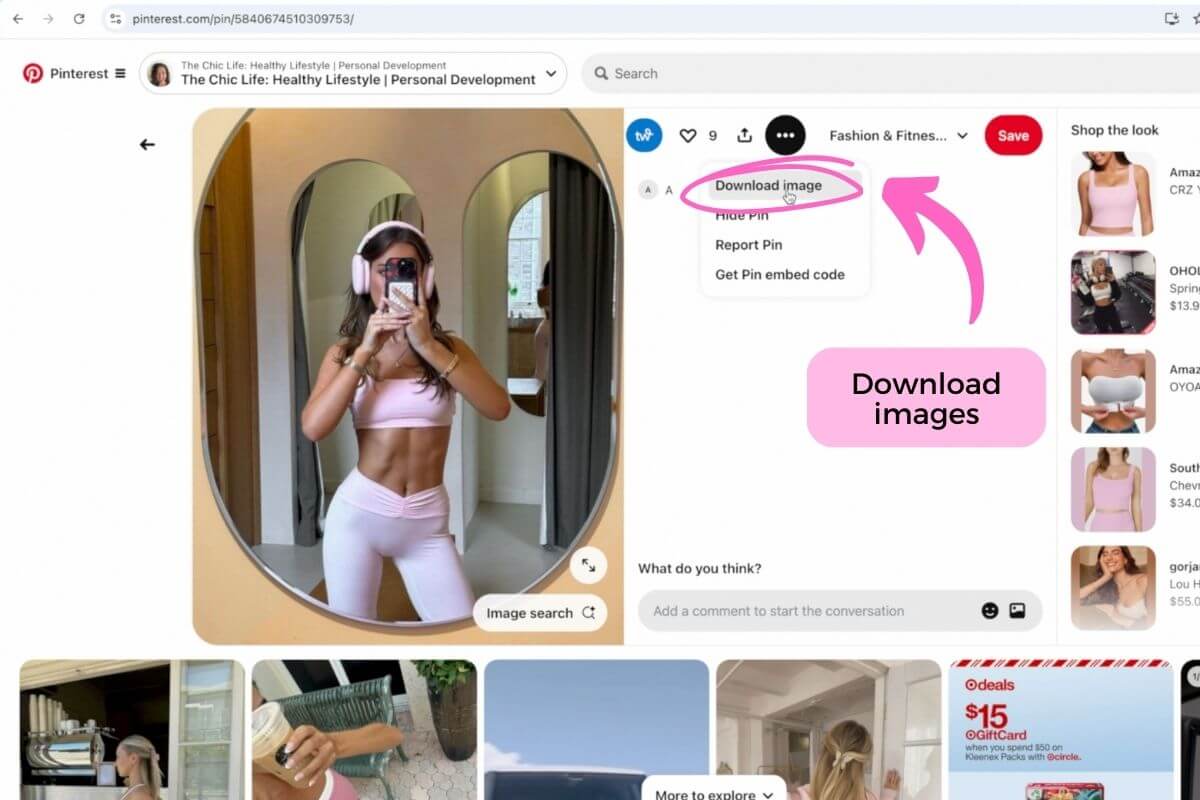
Note: The images are automatically saved to your computer. They go to the “Downloads” on my Macbook, but your settings may be different.
Tip on How Many Images to Get
Tip: I usually aim to get more photos than I think I’ll really need. However, you don’t want to get too-too many because it can get overwhelming. Not that I learned that the hard way or anything. 😉
Step 4: Create a Folder (and move your images into it)
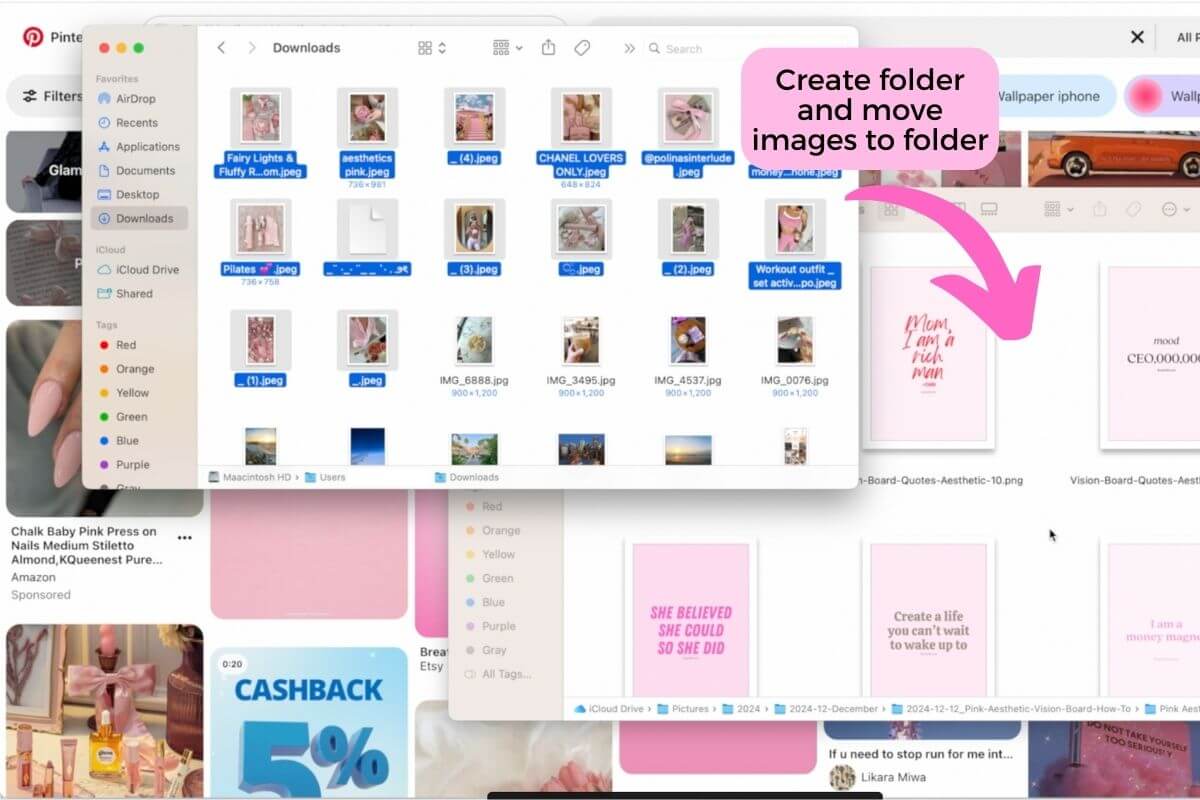
To keep things organized, I recommend creating a folder for your vision board project and moving all the images from your downloads folder to your vision board folder.
Step 5: Re-Check Your List
I find it helpful to cross reference my planning lists from Step 1 above to make sure I’m covering all of the themes, aesthetics, etc. that I planned up front.
Step 6: Get More Images (if needed)
Based on your evaluation from step 5, feel free to return to Step 3 and get more images. You can do this at any point.
Note: I sometimes find when I’m building my collage, I realize I’m missing a type of colorway or size that would make my vision board extra aesthetic, so I go back and get more images.
Step 7: Prep Your Vision Board Base
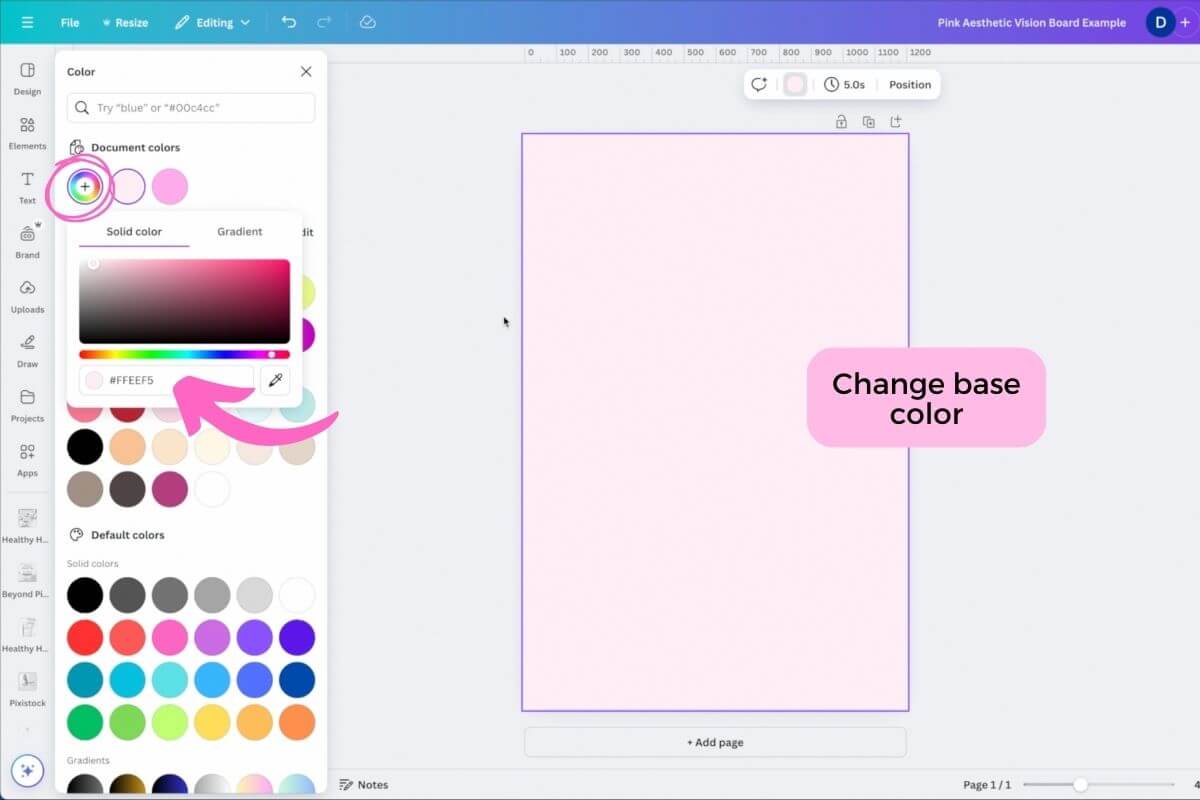
Whilst your background is typically covered by all of your images, I like to change the background color of my canvas so it goes with my theme just in case.
Step 8: Add Images to Your Vision Board
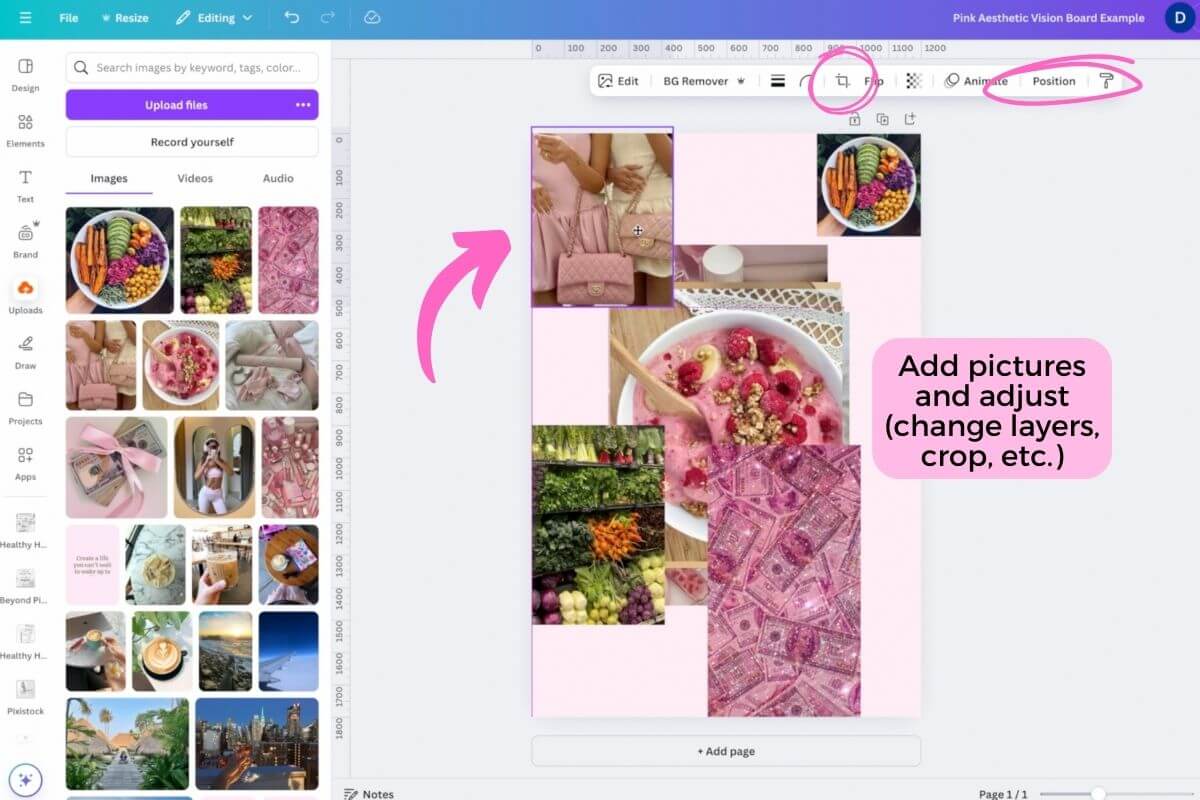
There are lots of ways to start adding images to your vision board. Do what works best for you. I like to add a few at a time, especially at first.
There are two ways to add images to your vision board:
- You can drag and drop them from your vision board folder onto the base.
- Or you can click the “Uploads” button in the left navigation panel and then click the “Upload files” button, navigate to your vision board folder, select your images, and click “Open” button.
You can add more in the next step.
Step 9: Make Your Collage
Again here, there are many ways to make your collage.
For this pink aesthetic vision board tutorial, here’s what I did:
- I started placing the images I added in Step 8 near the edges and corners. And I usually add my favorite photos first to make sure they have a place on my vision board and don’t get left behind.
- I also started playing with resizing the images.
- Once I got those roughly placed, I started adding a couple more images and seeing where to fit them based on where the other images were.
- As I added more images, I continued to play with the size and placement of the images.
- One thing I try to do is be mindful of the “overlappable space” of images. Basically, there are often parts of an image that can be covered because they don’t take away from the focus on the image. For example: the plane image has a lot of blue sky at the top. You can over a good amount of the sky without taking away from the “luxury travel” theme of the image.
- As the vision board started filling out, I also started playing with the layering of the images. You can adjust which image is on top of the others using the “Position” button in the mid-upper navigation panel or by right clicking the image and selecting the “Layer” option and then playing with sending the image backward or bringing it forward.
- I prefer layering my images that are part of the main collage, but you can also crop the images to completely remove sections of the image you don’t want to use.
- Remember, you can always add or remove more images.
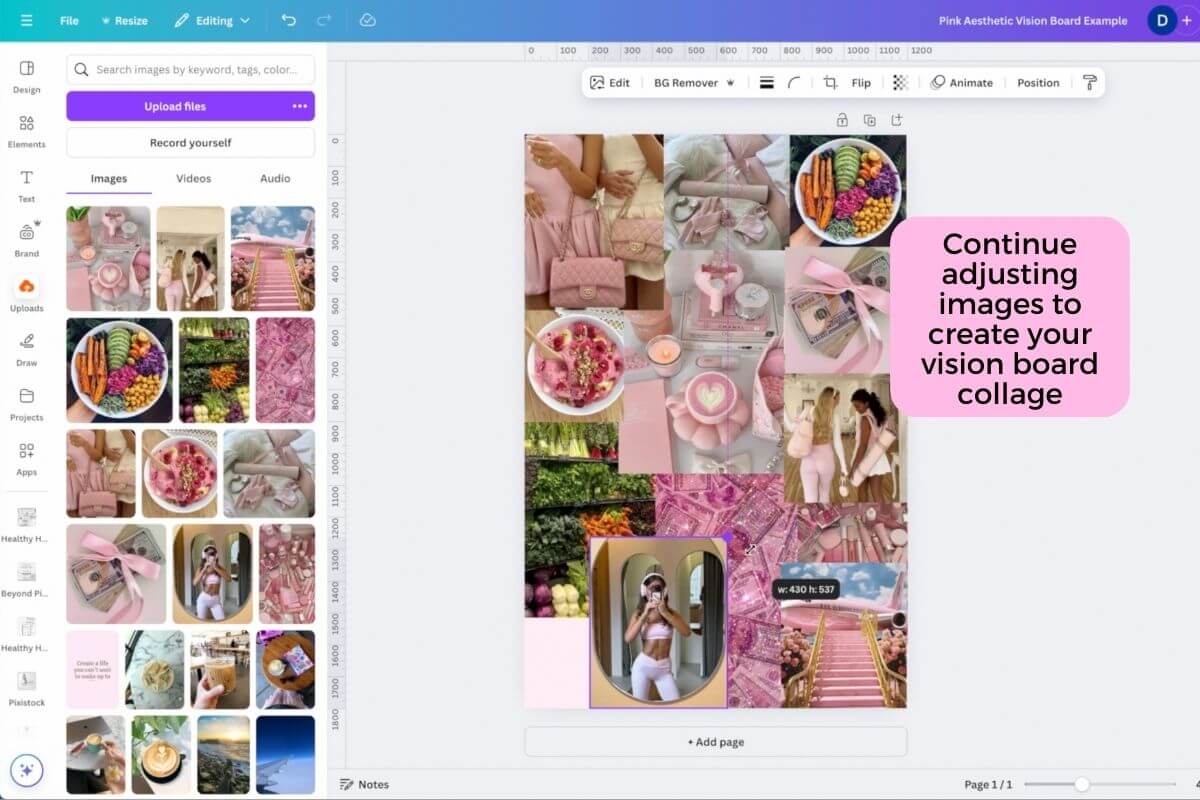
- Since we’re going for a pink aesthetic with this vision board, I also like to step back and look at the whole vision board to make sure it’s looking cohesive.
- Keep playing with the images until they start fitting together how you like.
We’ll add text graphics next.
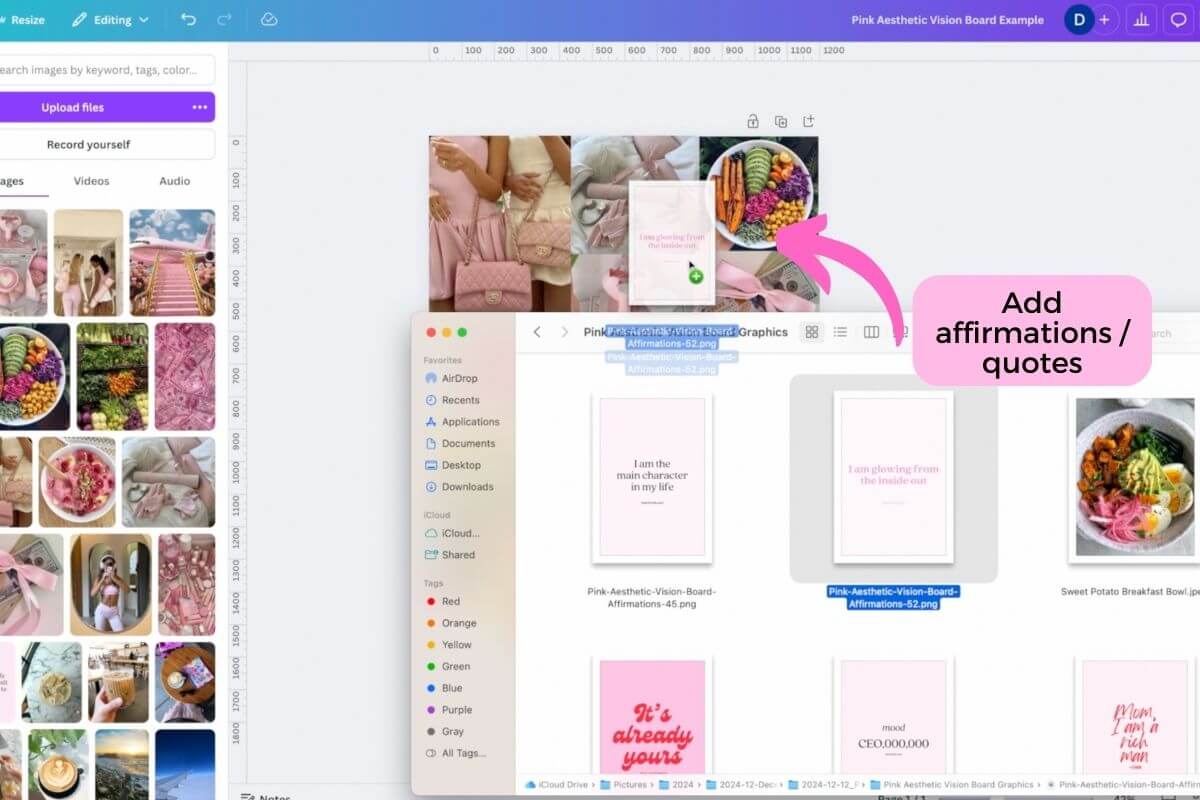
Step 10: Add Affirmations / Quotes
I like to get my collage pretty much built out before adding vision board affirmations and/or vision board quotes. This is because I like to make sure I can see all of the words on the text graphic. So I like them to pop at the top-most level.
Let’s add some vision board affirmations and/or quotes:
- Add your favorite affirmations and/or quotes to the vision board (like you did in Step 8).
- Position your text graphics where they’ll pop without covering up too much of the images behind them. I find it helpful to add these text images at the edges or 4-points where the background images meet.
- Since the plain color backgrounds of these images don’t add much, you can crop these images down.
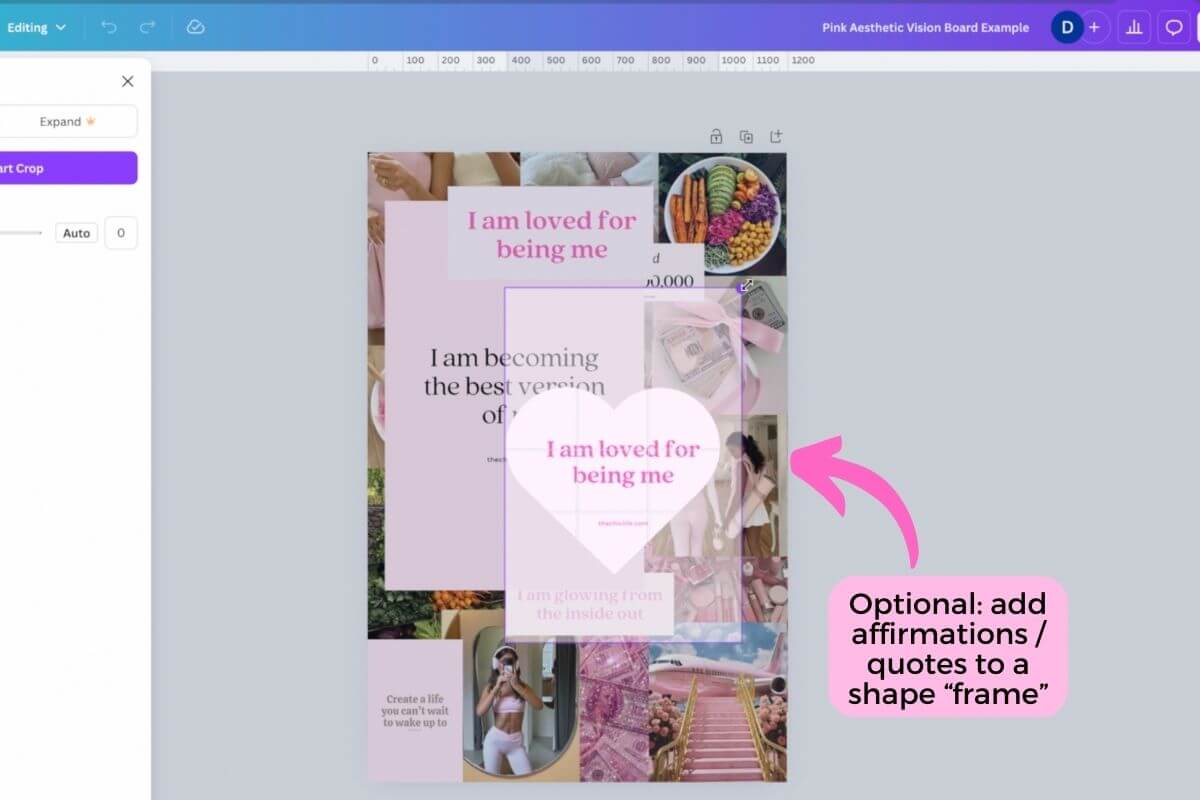
- I also love to put my text graphics into “frames” like the heart frame below (go to the Elements section in the left navigation panel and search for “Frame” and then pick your favorite frame shape). Drag your text image into the frame, double click it to resize / move the text, and click enter to set it.
Step 11: Add Stickers, Flowers, Etc.
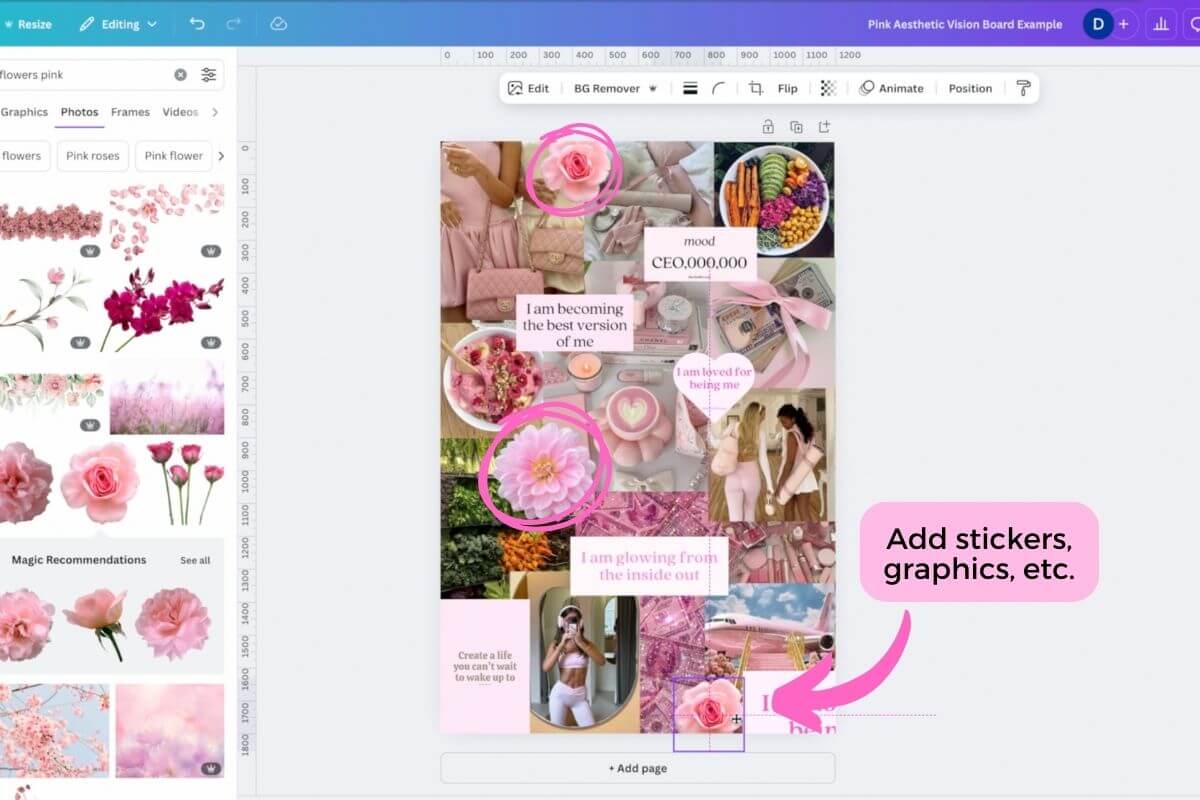
Lastly, for this pink aesthetic vision board, I wanted to add more pretty graphic elements:
- Go to the Elements section in the left navigation panel and search for “flower” or “pink flower”.
- Click on the flower you like to add it to the vision board. You can opt for “Graphics” for a more art look or use “Photos” for a more realistic look.
- Once the flower is added, move it where you want. As with the text graphics, I like to add these to where photos meet (edges, corners).
- Resize the flower. You can also rotate it by clicking on the flower image and then clicking on the rotate icon (which looks like two semi-circle arrows pointing in a circle), holding your mouse down, and moving your mouse to adjust the rotation.
I opted for flowers, but you can add any other graphics or photos that make you happy.
Step 12: Adjust All Images
Now that you have all of your key photos and elements on your vision board, take a look at the entire vision board from a “big picture” POV and see if anything is jumping out as needing a tweak.
You want your vision board to meet the aesthetics you planned in Step 1 and also have a nice, cohesive look.
Play with the layering, sizing, cropping, etc. of your images.
Step 13: Replace Images (if needed)
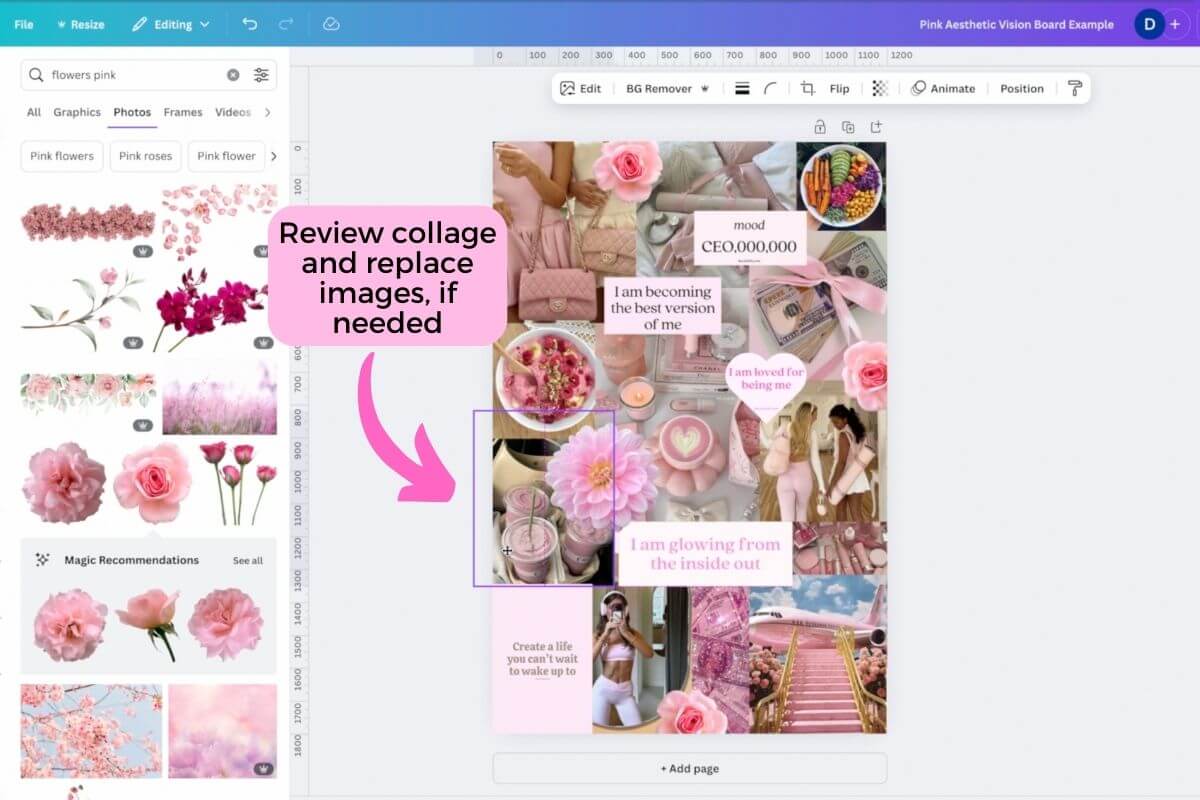
Don’t be afraid to completely replace any images for a more cohesive look or if they simply don’t make you as happy as others do.
For example: on this tutorial, I thought the “healthy food” images detracted a little too much from the pink aesthetic vision board look I was going for. So I replaced them with pink smoothie photos.
Step 14: Download
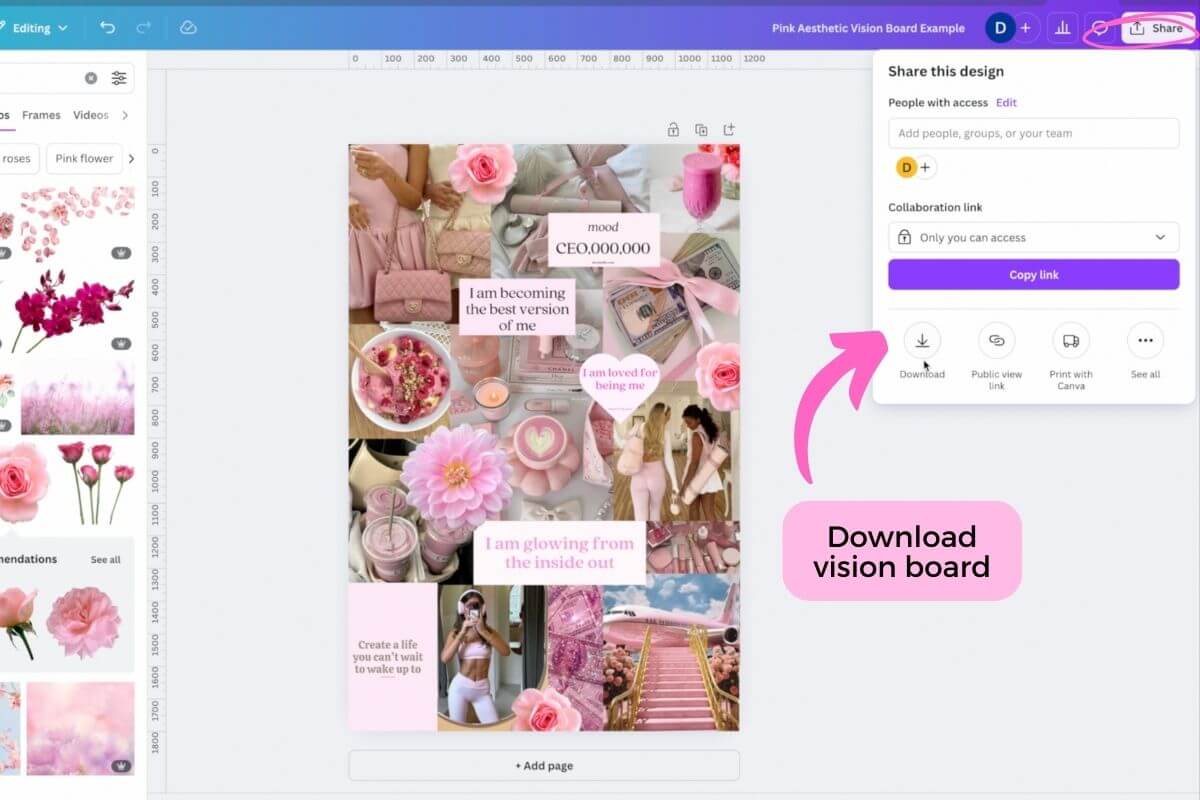
Once your vision board is done, it’s time to download it:
- Click the “Share” button in the top right.
- Then click on the “Download” button (it looks like an arrow pointing down to a straight line).
- Choose your preferred file type:
- I like . png or .jpg
- .png is usually better quality but a much bigger file size
- If you’re worried about file size, you could do .jpg
- Adjust any settings if you want.
- Name your file, choose your location, and click the “Save” button.
That’s it!
***
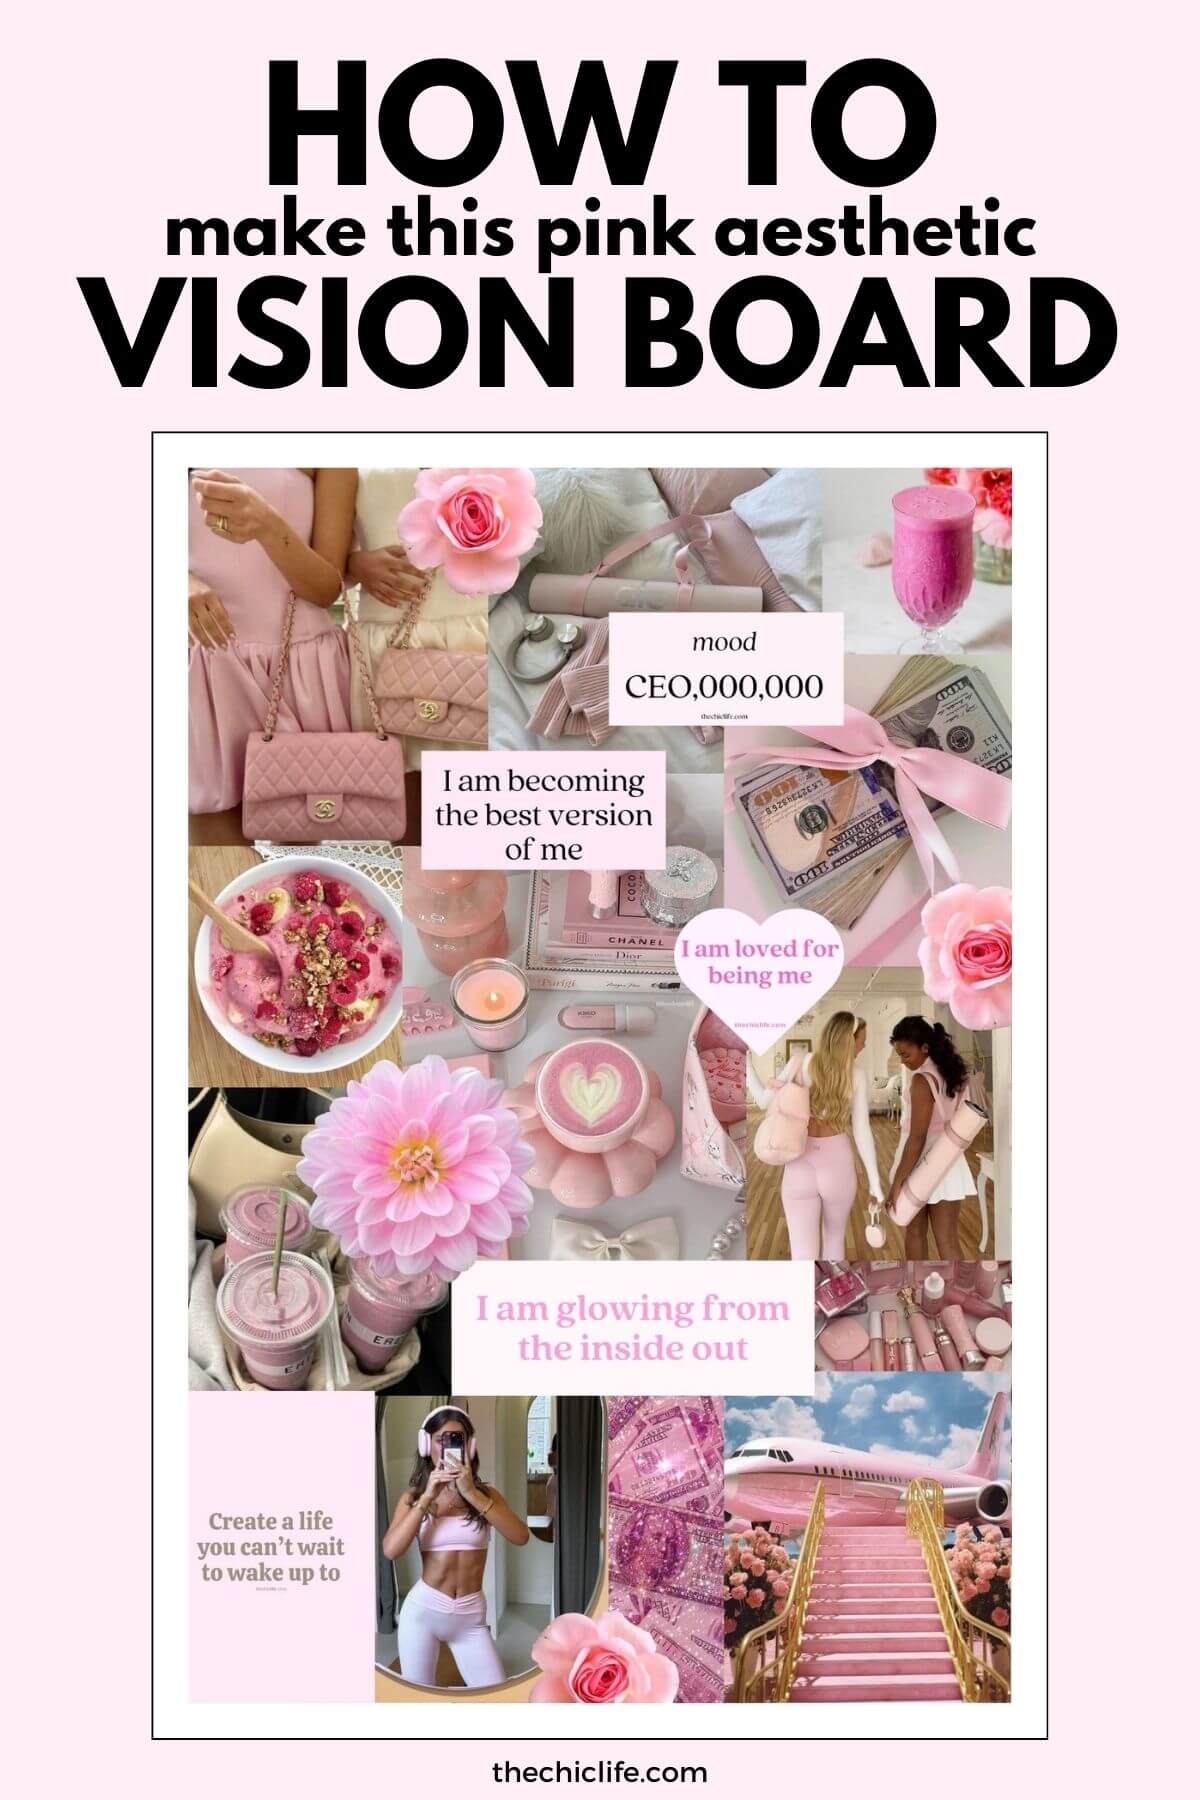
Summary: How to Make a Pink Aesthetic Vision Board

You don’t need special art skills or talent to make a beautiful vision board collage. Hopefully this How to Make a Pink Aesthetic Vision Board tutorial gave you the steps and tips you’ve been wanting.
And I hope this tutorial gave you confidence to make your very own aesthetic vision board. I know you can do it!
***
More Vision Board Tips + Resources to Love
Click here for my Ultimate Vision Board Guide
Click here to get more pink aesthetic affirmations for your pink vision board
***
Thank you for checking out my blog post on How to Make a Pink Aesthetic Vision Board for free using Canva and Pinterest. I hope this helps you feel more confident in making a beautiful vision board.
Questions? Comment below!