I think you’re going to want to bookmark this recipe for later…
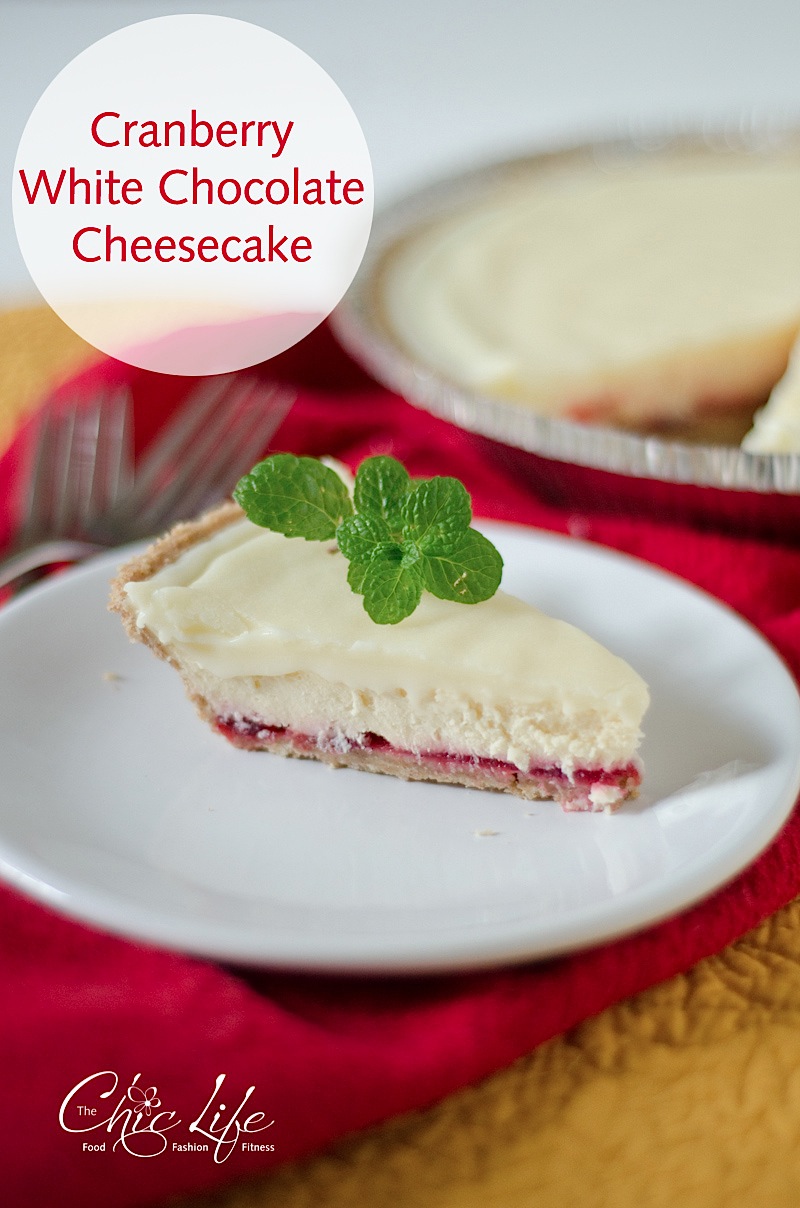
Cranberry White Chocolate Cheesecake made with cranberry sauce! Not only do I think this flavor combo is fun, but I’ve compiled tips on baking a crack-free cheesecake in the recipe at the end of this post. Just for you!
This is a little something I came up with when I was brainstorming ideas for Thanksgiving leftovers. But cranberry sauce is so prevalent around the holidays, in general, I think it will work for many occasions. In fact, you don’t even need to wait for leftovers. If I were you, I’d just make extra cranberry sauce so you can set some aside for this recipe.
I brainstormed this concept before I really thought about what I was getting myself into. I haven’t made many cheesecakes before, so I was a little intimidated since they seem to be a bit finicky. I do like a good challenge, though, and I believed I could do it if I put my mind to it. It also helped that I’m an analytical person, so I researched the heck out of this and very carefully approached the whole thing. By using some great online resources and paying careful attention to detail, I was able to create something that was not only edible, but a big hit with hubby (and me). In fact, the two of us ate this whole thing! It took a few days, but we did it. And no, it was not a struggle.
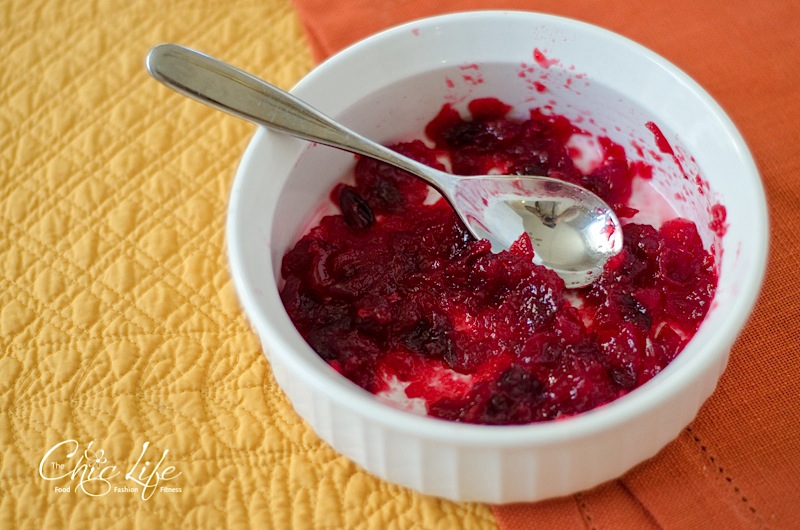
For years, my family used to eat cranberry sauce from the can, but since my sister learned how easy it is to make from scratch, she always whips up a batch for our family.
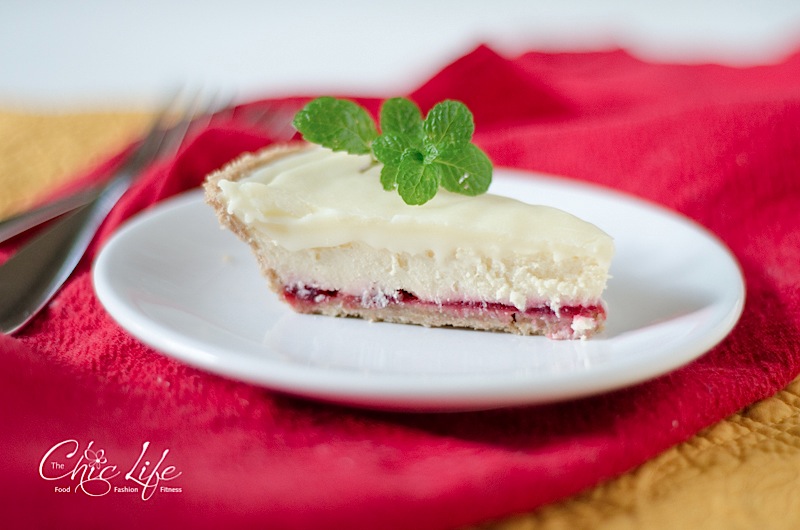
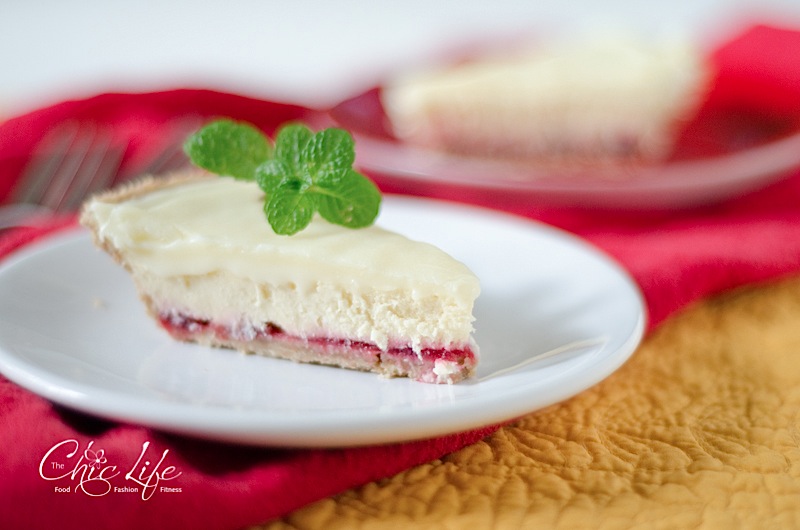
I love how the layer of cranberry sauce gives a tart bite to this dessert.
{Using a tart dish for my water bath – had to push the cheesecake to the side to get the water in there}


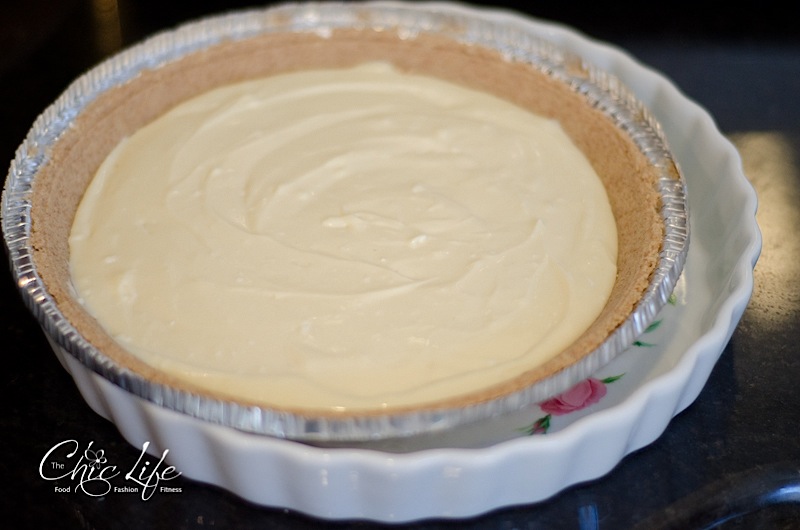
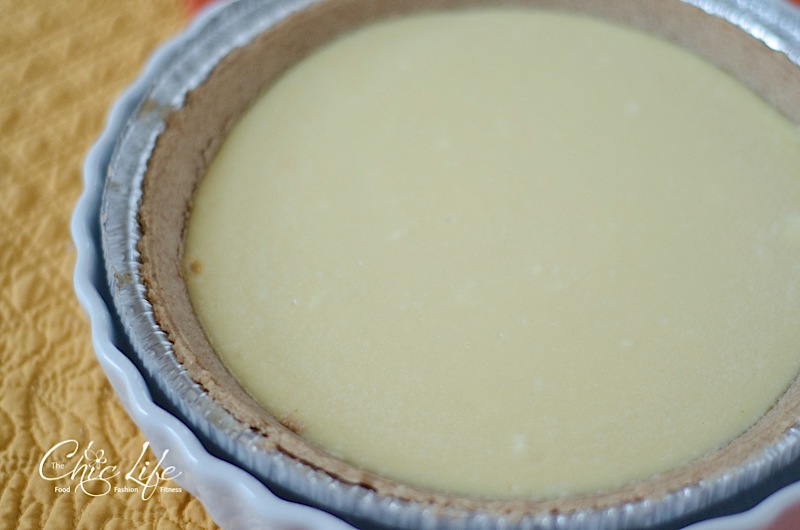
Here’s the baked cheesecake. I couldn’t believe how smooth the top was. My camera couldn’t even focus on the cheesecake top! I was so afraid I would mess this up, but the tips I found online worked!

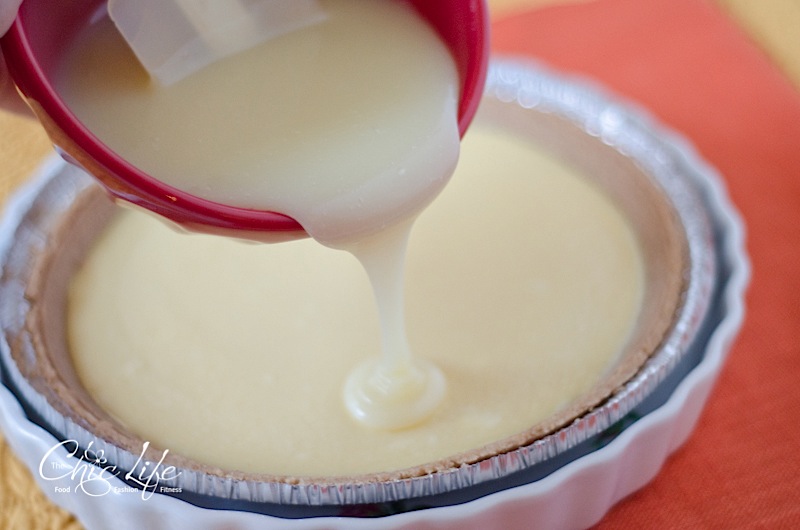
I also thought I’d mess up the white chocolate topping (shown above just before I started whisking together)…

…but it just needed time and elbow grease – it smoothed right out.
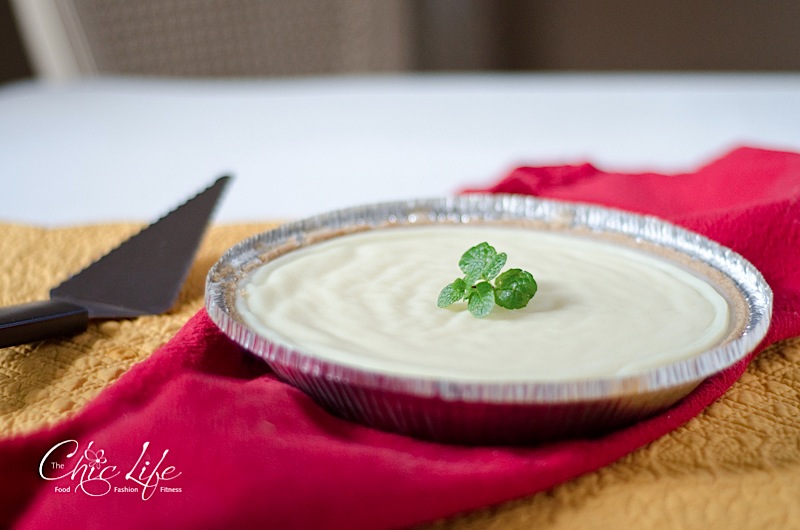
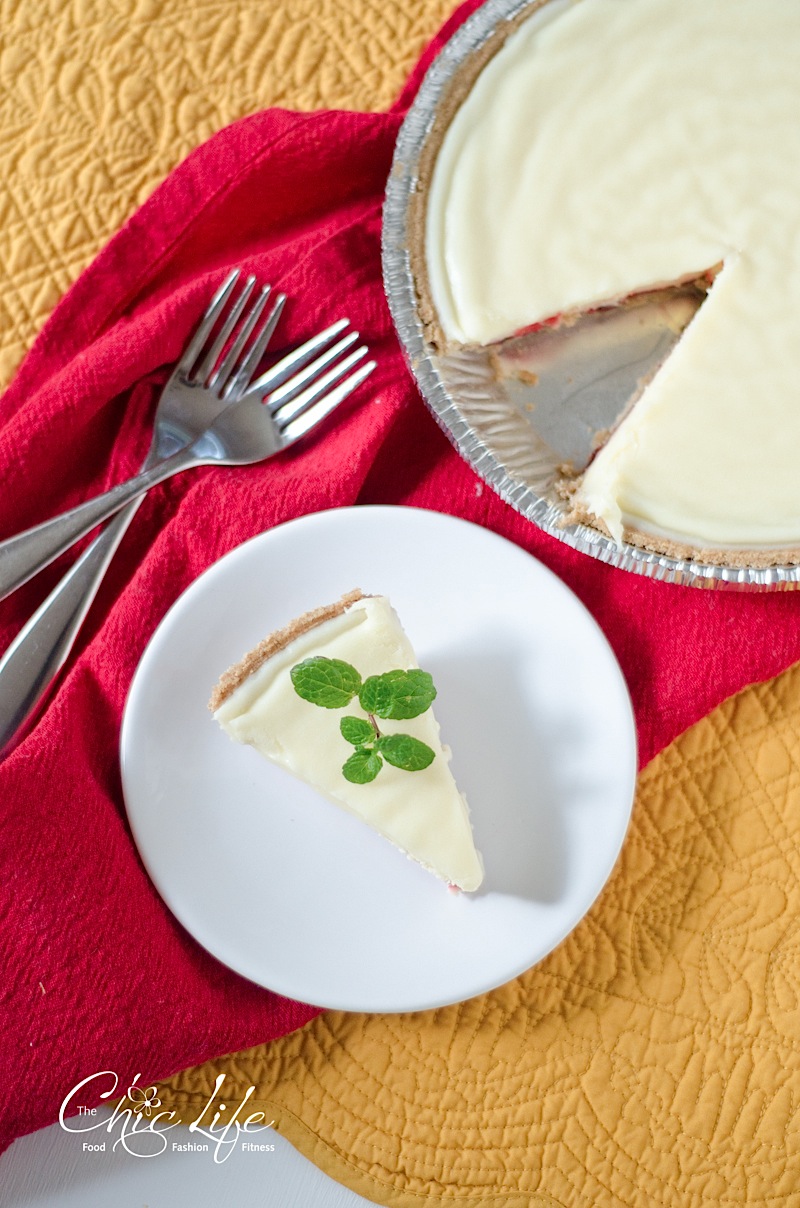
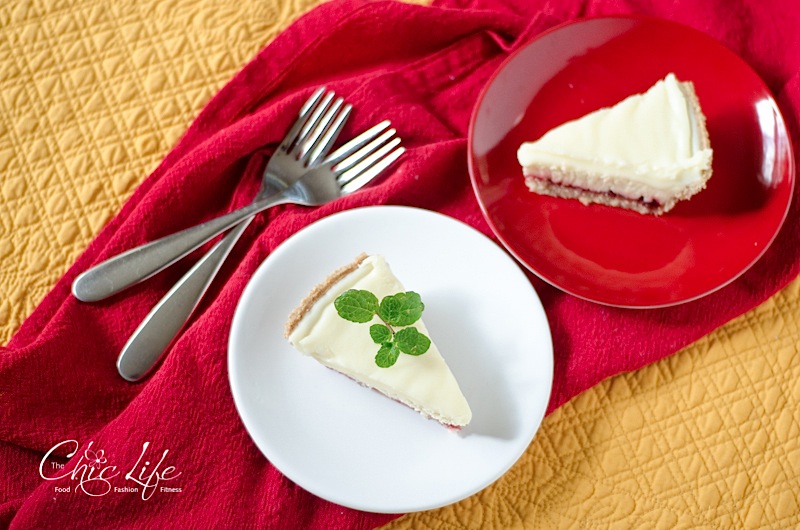
Cranberry White Chocolate Cheesecake (Using Leftover Cranberry Sauce) {Recipe}
Make extra cranberry sauce for your next holiday meal so you can make this festive cheesecake for dessert. Layers of tart cranberry sauce, creamy cheesecake, and sweet white chocolate make for a delicious dessert that’s perfect for before, during, or after the holidays. I adapted my friend Sarah’s family friend’s famous basic cheesecake recipe and added in some general cheesecake baking (and chocolate) tips from a few fabulous online resources: Simply Recipes, Joy of Baking, Bon Appétit, Yahoo Answers, and Pastry Chef Online (see reference for details).
The recipe is pretty simple, but it looks long because I added a lot of notes to help you along. See photos above for visual tips. See references below for additional info on the recipe and more tips on making great cheesecake.
*Vegetarian*
Prep time: 10 minutes active time to prepare cheesecake filling (remember you’ll need time before hand to get ingredients to room temperature), 10 minutes active time to prepare white chocolate topping
Bake time: 20-30 minutes actual bake time (remember to allow 1 hour for cool time between start and end of prep time, plus additional time to chill in the refrigerator)
Total time: active time for you will be about 2 hours from when you start preparing to when you’re ready to put the finished cheesecake in the refrigerator to cool; allow about 1 whole day or 2 hours plus overnight for preparation and chill time for the whole thing
Yields: 1 9-inch cheesecake
Ingredients:
- 1 prepared 9 inch pie crust
- 1/3-1/2 cup leftover cranberry sauce (If you have more leftover cranberry sauce than 1/2 cup, I think up to 1 cup would work in this recipe – you’ll just have a thicker layer of it on the bottom)
- 1 8-ounce package cream cheese, room temperature
- 1/4 cup granulated sugar (preferably raw)
- 1 tablespoon all purpose flour (preferable unbleached)
- 1 egg, room temperature
- 2 tablespoons (room temperature) plus 1/2 cup heavy cream (milk may work)
- 1/2 teaspoon vanilla extract
- hot water, for creating the water bath – amount will depend on size of dish you’re filling (I heated a teapot full of water for mine)
- 1 cup white chocolate pieces/chips
Directions:
- Pre-heat oven to 350 degrees F. Note: I started heating water in a teapot at this point, too, for the water bath.
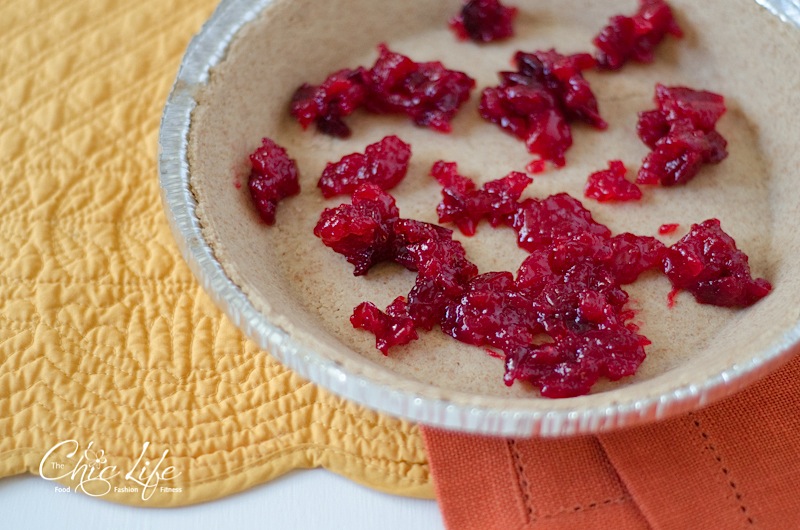
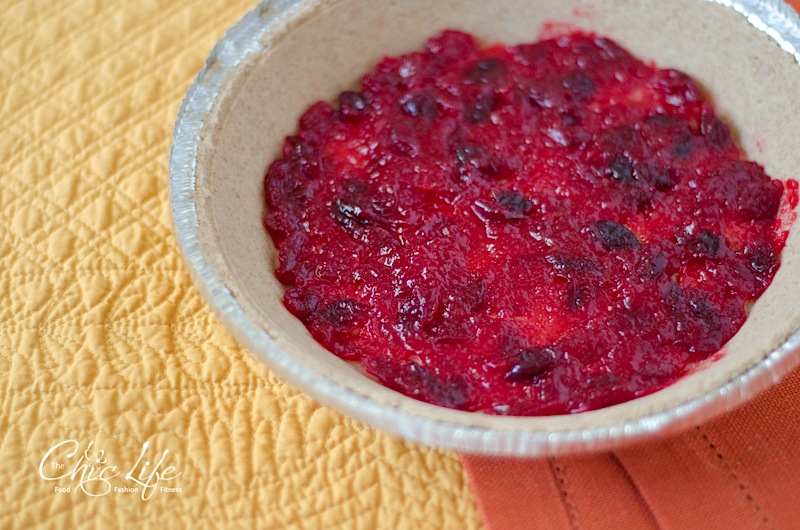
- Stir cranberry sauce a bit so it’s more pliable. Gently spread in the bottom of your pie crust. Note: I let my cranberry sauce sit at room temperature for about 20 minutes prior to putting my dessert together so it would be easier to spread. You could probably also microwave it very briefly (5-10 seconds).
- Being careful to not over-mix, mix cream cheese, sugar, and flour until just combined. Mix in egg. Mix in 2 tablespoons of heavy cream and vanilla extract until just smooth.
- Pour cream cheese mixture into prepared pie crust and spread evenly with a spatula. Take note of how the top of the cheesecake looks shiny (this will help you know how to tell when it’s done later).
- Place the pie dish into a larger dish (I used a tart dish, but just something large enough to fit the pie dish with some room on the sides will work) and carefully fill it with hot water till the liquid comes about 3/4 up the sides of the pie dish. VERY carefully put both dishes into your oven in the center of the oven (horizontally and vertically center). Note: You can either do the water bath before or after putting the dishes into the oven. Some people like to pull the oven rack out just a wee bit (but not so much that it would fall if you placed a dish on it), place the empty large dish (and pie dish) on it, and fill the water bath there. Once the water bath has been created, carefully push the rack and the dish back till the dish is centered.
- Bake for 20-30 minutes or until the whole top of the cheesecake is done and the top looks dull. Note: You can also gently tap the center of the cheesecake, and if it feels firm, it should be done. Additionally, you can shake your pan a little, and it should jiggle only slightly (mine didn’t budge at all – I think because the layer of cheesecake on this recipe is thinner than other cheesecake recipes).
- Leave cheesecake in the oven, crack the door, and let it cool like this for 1 hour.
- Put white chocolate into a bowl. Heat 1/2 cup heavy cream just to a boil and then pour over white chocolate. Let sit for 5 minutes and then whisk until smooth. Pour white chocolate mixture over cheesecake in an even layer and let cool to room temperature (about 15-30 minutes).
- Place finished cheesecake into refrigerator to chill for at least 2 hours or overnight. Serve and enjoy!
References:
- Cracking in the top of the cheesecake is a common problem, but I really wanted to make the top of mine smooth since I was putting the white chocolate layer on top, and I wanted it to look pretty. I learned from Joy of Baking that over-mixing and baking too long are two common problems that cause cracking. I learned from Simply Recipes that baking the cheesecake in a water bath and gently cooling the cheesecake in the oven with the door cracked will help reduce the risk of cracking. I used all of these tips when I made my cheesecake, and it came out smooth as silk. So, I included these tips in the recipe above.
- Since over-baking was cause of cracking in the cheesecake, I wanted to make sure I took the cheesecake out as soon as it was done. I found two helpful posts online that gave tips on when to tell the cheesecake was done. You can click here to view one article by Bon Appétit and click here to view some feedback from Yahoo Answers. I found the shiny vs dull test to be most effective for me.
- I wanted the top layer of white chocolate to be a little soft, so rather than just melting white chocolate, I researched other ideas. I found this post by Pastry Chef Online very helpful for using chocolate, in general.
***
You may also like…
These other festive TCL recipes:
- Coconut Pumpkin Pie with Creamy Coconut Sauce
- Pâtembouche (Cookie Dough Ball Tower)
- Heart Shaped Mini Pies and Pie Pops
Or these recipes from around the web:
- Turkey Quesadillas with Chipotle Cranberry Sauce by Foodie Bride
- Red Velvet Cheesecake by Willow Bird Baking
- Oreo Cheesecake Cookies by Prevention RD

I had so much fun with this cheesecake recipe that I’m hoping to come up with some more cheesecake ideas!
Happy baking and happy holidays!
***
Did you like this post? Please consider clicking on the Facebook-Like button or one of the other buttons at the end of this post to share. Click here to get free updates delivered to you via email or feed.
Thanks for reading!
Looks delicious! I like that the cranberry is under the cheese layer rather than the top like most cheesecake.
I love a good cheesecake and your recipe looks amazing.
Yum. That is all.
Awesome recipe 🙂
I love a good cheesecake… Here’s a New York Cheesecake you might like to try.
New York Cheesecake Recipe
Thanks for sharing.
Katie
This cheesecake recipe looks wonderful
The recipe was a failure, but still gave sweet results.
Most of the problems stemmed from steps 7 and 8. Indeed, leaving the cheesecake to sit in the oven just overcooks it and makes it crack. On the other hand, there is no ingredient in the chocolate mixture to make it stiffen on its own (gelatin or otherwise).
Basically, I had to remove the cheesecake when it began to crack and the chocolate mixture gave a sauce more than anything else.
My conclusion were that it’s as simple as to add the chocolate mixture on step 7 instead in order to make it cook gently. I’m going to try it again tonight, since the results were still so edible and good tasting.
Probably just a small editing mistake on your part.
I’m still not sure about the utility of the water bath, though…
Hi Nicola, Sorry to hear the recipe didn’t turn out just right. When you left the cheesecake in the oven on step #7, did you remember to crack the door so it was slightly open? That may help prevent it from cracking. Otherwise, it may just be a difference in ovens? I didn’t notice any cracking on mine, so maybe it was a difference in heat levels or something? For the chocolate, maybe try adding less heavy cream? I probably should have given weight measurements for the chocolate since measuring cups aren’t a very accurate measure. The chocolate part is supposed to be like a ganache, so it should still be a little soft. If you want the chocolate part really firm, you could skip (or drastically reduce) the heavy cream and just melt it. Then, when it cools, it will return to firm chocolate form. Hope that helps! 🙂
Hi Diana…You may want to edit step #3 to say “mix in 2 tablespoons of cream” instead of “mix in cream” – I almost added the half cup as well and then realized it was actually for the white chocolate layer. That could have caused a soupy mess of a cheesecake! It is baking right now so, fingers crossed, I hope it turns out!
Hi Kathy! Great idea! I just updated the recipe with your suggestion. Thank you so much for letting me know! I hope the cheesecake turns out great for you! 🙂 Diana
Hi again, Diana…The cheesecake turned out great! Your suggestions worked and the cake didn’t crack, and it was delicious! Even my husband who is not a big cheesecake fan liked it. I might do a little less of the white chocolate topping next time (my husband disagrees!) or maybe try some dark or milk chocolate. And different fruit on the bottom. So many ideas for this recipe since it turned out so well and was pretty easy – thanks!
Hi Kathy! Woohoo! I’m so glad to hear the cheesecake turned out so nicely! Great job! Let me know if you come up with any extra-fabulous cheesecake combos. There are definitely a lot of great possibilities out there! Thanks so much for checking out my recipe AND stopping back by to let me know you enjoyed it! Comments like these keep me inspired to continue creating new recipes! 🙂